

Yale YRD216 Manual Overview
This section provides an overview of the Yale YRD216 manual, which offers comprehensive guidance for installation and programming of the Assure Lock Push Button Deadbolt․ The manual includes step-by-step instructions to help users set up their new lock․
The Yale Assure Lock YRD216 is a push-button deadbolt designed to enhance home security and convenience․ This keyless entry system eliminates the need for traditional keys, offering secure access through a backlit keypad․ The YRD216 can be integrated with Z-Wave automation systems, allowing users to lock/unlock doors, create pin codes, view access history, and receive notifications remotely․ The lock is designed to be user-friendly and provide a reliable way to secure your home․ This lock allows for a simple installation process․ The YRD216 provides a secure and modern alternative to traditional locks․ With features like the ability to add user codes and the option for network integration, the Yale Assure Lock YRD216 is a versatile and reliable choice for any homeowner seeking enhanced home security․ It combines advanced technology with a simple, straightforward user interface, making it accessible for all users․ The lock also offers options for setting up user codes․
Purpose of the YRD216 Manual
The primary purpose of the Yale YRD216 manual is to provide a comprehensive guide for users to install and operate the Assure Lock Push Button Deadbolt effectively․ This manual serves as a detailed resource, walking users through each step of the installation process, from preparing the door to mounting the lock components․ It also offers clear instructions on programming the lock, including creating user codes and resetting the device if necessary․ The manual aims to ensure that users can confidently install and use their new lock, thus maximizing its security and convenience features․ It provides necessary information to allow users to fully utilize the features of the lock, enhancing home security and user experience․ It also serves as an essential tool for troubleshooting and understanding the various functions of the YRD216․ The manual simplifies complex procedures, making it easy for all users to understand and follow․ It is a vital resource for both first-time users and those familiar with smart lock technology․

Installation Process
This section details the installation process for the Yale YRD216․ It includes preparing the door, installing the strike plate, keypad, mounting plate, and attaching the cable․ Follow each step carefully for proper setup․
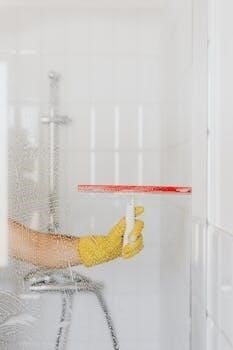
Preparing the Door for YRD216 Installation
Before installing the Yale Assure Lock YRD216, it’s essential to properly prepare your door and frame․ Begin by removing any existing door hardware, including the old lock and latch mechanism․ This ensures a clean surface for the new installation․ Double check the door to confirm it aligns correctly with the frame, and that the door is not warped or damaged, as this can cause problems when installing the lock․ Measure the door thickness and backset to verify compatibility with the YRD216 specifications․ The door should be between 1 3/8″ and 1 3/4″ thick․ If your door is thicker than 1 3/4″, you need to purchase a thick door kit․ Also, ensure that the door jamb is in good condition and aligned with the door․ Check that the latch hole is the correct size and depth․ It may be necessary to widen the hole if it is too small․ By taking these crucial steps, you will lay the foundation for a smooth and secure lock installation․
Step-by-Step Installation Guide
The installation of the Yale Assure Lock YRD216 involves several key steps․ First, you must install the strike plate and latch into the door frame and door respectively, making sure that they fit properly and are securely fastened․ Next, carefully install the keypad onto the exterior side of the door, ensuring it’s flush against the door surface․ Then, proceed to install the mounting plate on the interior side of the door, aligning it with the keypad on the other side․ After that, you will need to attach the cable connecting the keypad and the interior components and ensure it is properly connected․ Finally, secure all parts with screws․ Double-check all connections are firm before moving on․ The manual provides detailed diagrams and instructions for each step to guarantee the lock is installed correctly and will work effectively․
Installing Strike Plate and Latch
The initial step in installing your Yale YRD216 involves fitting the strike plate and latch mechanism․ Begin by carefully removing the existing strike plate from the door frame․ Position the new strike plate aligning it with the bolt on the door frame and securely screw it in place․ Ensure the strike plate is flush with the frame to allow the door to close smoothly․ Next, install the latch into the door edge, ensuring it is correctly aligned with the strike plate․ Fasten the latch with the provided screws, making sure it is stable and does not wobble․ Test the door closure to verify the latch engages properly with the strike plate, ensuring a secure fit․ These initial steps are critical for the proper functioning of the lock․
Keypad Installation

Following the latch and strike plate installation, the next crucial step involves mounting the keypad on the exterior side of your door․ Carefully position the keypad assembly, ensuring that the cable is routed correctly through the designated hole in the door․ Align the keypad with the previously installed latch mechanism, making certain it fits snugly against the door surface․ Once aligned, secure the keypad using the appropriate screws, tightening them evenly to avoid any damage․ Double-check that the keypad is firmly attached and doesn’t move when pressed․ This precise installation ensures the electronic components of the lock operate correctly, providing a secure and reliable entry point to your home․ This step is critical for the system to function as intended․
Mounting Plate Installation
After successfully installing the keypad, the next step is to install the mounting plate on the interior side of the door․ This plate serves as the foundation for the interior components of the lock․ Align the mounting plate carefully with the holes in the door, ensuring that it matches up with the keypad on the other side․ Secure the mounting plate to the door using the provided screws, tightening them gradually and evenly to avoid any distortion․ It is crucial to ensure the mounting plate is flush against the door surface and is securely fixed․ This provides a stable base for attaching the lock’s interior components and is essential for the lock’s proper functionality and durability․ This step sets the stage for the final assembly․
Cable Attachment
The next critical step involves attaching the cable that connects the exterior keypad to the interior components of the Yale YRD216 lock․ Carefully locate the cable connector extending from the keypad, and align it with the corresponding port on the interior mounting plate․ Gently push the connector into the port, ensuring it is fully seated and securely connected․ A proper connection is vital for the lock to function correctly; if not, the keypad and lock mechanism may not communicate effectively․ Make sure the cable is not pinched or strained, and is neatly routed to avoid any damage or interference during the final steps of the installation․ This cable is what allows power and data to flow between the keypad and the rest of the lock․

Programming and Usage
This section details the programming and usage of your Yale YRD216 lock․ It covers creating user codes, setting up a master code, and using the factory reset procedure; These instructions will allow you to customize your lock settings․
Programming Instructions for YRD216
The Yale YRD216 lock programming begins with establishing a master code, which is essential for all subsequent programming tasks․ It’s important to note that this master code must be created before any user codes can be added․ The lock supports up to 250 user codes when paired with a network module, providing extensive access control․ However, without a network module, the lock can hold a maximum of 25 user codes․ To begin, press the “Yale” logo on the keypad, then enter your master code, followed by the gear icon․ From here, you can navigate the menu to add or delete user codes․ Always refer to the manual for specific menu options and detailed procedures, as these may vary slightly depending on your lock’s firmware version․ Remember to confirm each step by pressing the gear icon․ The programming interface is designed to be user-friendly, but it’s imperative to follow the instructions carefully to ensure proper lock function and security․
Creating User Codes
Creating user codes for the Yale YRD216 is a straightforward process, but it requires the master code to be set up first․ Once the master code is established, you can proceed to add individual user codes, each consisting of 4 to 8 digits, to grant access․ To create a user code, begin by pressing the “Yale” logo on the keypad, followed by the master code and the gear icon․ Navigate to the ‘Add User Code’ option within the menu, which is typically accessed by pressing the number ‘1’․ Then, enter the new user code you desire, followed by the gear icon to save it․ The YRD216 lock can store up to 250 user codes when connected to a network module, or 25 codes without one․ Always ensure that each user code is unique and shared only with authorized individuals․ The user codes allow specific individuals access to the door, making it easy to manage entry to your home or office․ After creating user codes, you can verify them by testing the lock with each new code․
Factory Reset Procedure
The factory reset procedure for the Yale YRD216 is necessary when you need to clear all user codes, settings, or troubleshoot issues․ Begin by removing the battery cover and the batteries from the interior escutcheon to access the reset button․ The reset button is a small, typically red, button located on the interior of the lock․ With the batteries removed, locate the reset button․ Press and hold the reset button down while reinserting the batteries․ Continue holding the reset button for approximately 10-15 seconds, or until you observe the lock’s LED flashing or hear a beep to confirm the reset․ Once you’ve held the button, release it․ All user codes and settings will be erased, and the lock will return to its factory default settings․ After a factory reset, you’ll need to reprogram the master code and create new user codes․ This process is critical when moving into a new home or dealing with forgotten codes․ The lock will be as if it were brand new, ready for setup․