
Sensi Thermostat Installation Manual PDF⁚ A Comprehensive Guide
This guide provides a detailed walkthrough for installing your Sensi thermostat‚ covering everything from initial setup to connecting to your Wi-Fi network. It includes essential steps and troubleshooting tips for a successful installation.
Sensi thermostats are designed to offer both convenience and energy efficiency‚ allowing you to control your home’s temperature remotely via a smartphone app. These smart thermostats are known for their user-friendly interface and compatibility with various HVAC systems. The Sensi lineup includes models like the Sensi Touch and Sensi Lite‚ each providing a range of features to suit different needs and preferences. These devices aim to simplify the process of managing your home’s heating and cooling‚ offering features like scheduling‚ geofencing‚ and usage reports. Sensi thermostats not only enhance comfort but also help in reducing energy costs by optimizing temperature settings based on your routines and preferences. With step-by-step app guides‚ the installation process is made accessible to most homeowners‚ facilitating a smooth transition to smart temperature control.
Downloading the Sensi App
The first crucial step in setting up your Sensi thermostat is downloading the dedicated Sensi mobile application. This app is available for both iOS and Android devices‚ ensuring broad accessibility. To download‚ navigate to your device’s app store – either the Apple App Store for iOS or the Google Play Store for Android – and search for “Sensi thermostat”. Once located‚ click the download or install button. Ensure you have a stable internet connection to facilitate a smooth download process. The Sensi app is essential as it provides step-by-step instructions for installation‚ wiring‚ and connecting your thermostat to your home’s Wi-Fi network. The app also allows you to manage your thermostat settings‚ create schedules‚ and monitor energy usage remotely. It is also through this app that you will register your thermostat.
Creating a Sensi Account
After downloading the Sensi app‚ the next vital step is to create a Sensi account. This account will serve as the central hub for managing your thermostat and its settings. To begin‚ open the Sensi app and locate the option to “Create an Account” or “Sign Up.” You will typically be prompted to provide an email address and a secure password. Ensure the email address you provide is one you actively use‚ as it will be needed for account verification and potential password recovery. After filling in the required details‚ follow the on-screen prompts to complete the account creation process. This might include verifying your email address by clicking a link sent to your inbox. With your account set up‚ you’re now ready to proceed with the next phases of your Sensi thermostat installation process‚ which involve adding your device and connecting to your Wi-Fi network.

Adding Your Thermostat to the Sensi App
Once you’ve successfully created your Sensi account‚ the next step is to add your physical thermostat to the app. This process allows you to manage and control your thermostat remotely. Open the Sensi app and log in with your newly created account credentials. You should see an option‚ often a “+” sign‚ to ‘Add a Thermostat’. Tap this‚ and the app will guide you through the process. First‚ you might need to choose the specific model of your Sensi thermostat‚ such as the Sensi Lite or Sensi Touch. The app may then prompt you to scan a QR code on the thermostat or enter a PIN manually. If scanning is difficult‚ look for the option to manually enter the code located near the QR code. After that‚ follow the on-screen prompts which might involve confirming the thermostat’s model and potentially giving it a name for easy identification within your app. Once completed‚ your thermostat is now linked to your Sensi app.
Choosing Your Sensi Thermostat Model
Before beginning the installation process‚ it’s crucial to identify the specific Sensi thermostat model you have. This step is vital because the Sensi app will prompt you to select your model to ensure the correct setup instructions and features are applied. Sensi offers various models‚ including the Sensi Lite and the Sensi Touch‚ each with distinct features and capabilities. The Sensi Lite smart thermostat is typically identified by model numbers in the 1F87U-42WF series and ST55 series. The Sensi Touch models‚ such as the Sensi Touch 2‚ have their own unique identification. When adding a new thermostat to the app‚ you’ll be presented with a list or visual options where you can select your model. If you’re unsure‚ check the model number usually located on the back of the thermostat or on its packaging. Selecting the correct model will ensure a smooth installation and proper functionality within the app.
Step-by-Step Installation Process
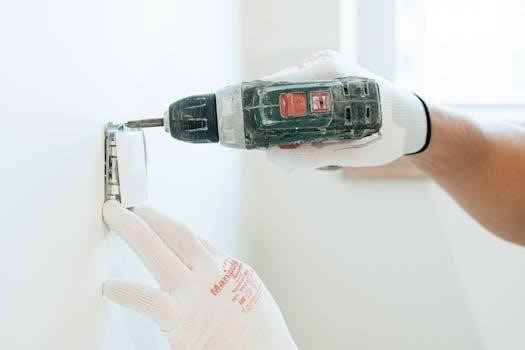
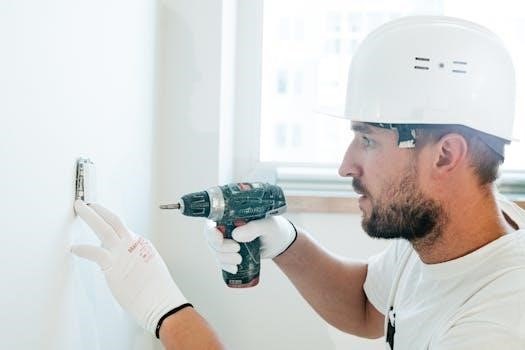
The Sensi thermostat installation process involves several key steps‚ starting with preparing your existing thermostat. Begin by turning off the power to your HVAC system at the breaker. Next‚ carefully remove your old thermostat from the wall‚ noting the wiring configuration. It is crucial to label each wire with the corresponding terminal on your old thermostat before disconnecting them‚ which will help ensure proper connection to your new Sensi thermostat. The Sensi app also provides detailed step-by-step instructions for each step of this process‚ including helpful videos. Once labeled‚ disconnect the wires from the old thermostat. Now‚ mount the Sensi thermostat base to the wall‚ ensuring it is level. The next step involves connecting the labeled wires to the appropriate terminals on the Sensi base‚ following the guidance provided by the Sensi app.
Labeling Existing Wires
Before disconnecting any wires from your old thermostat‚ it’s crucial to label each one accurately. This step is essential for a successful Sensi thermostat installation. Use the provided labels or masking tape and a marker to identify each wire based on its corresponding terminal on the old thermostat. For example‚ label the wire connected to the ‘W’ terminal as ‘W’‚ the wire connected to ‘R’ as ‘R’‚ and so forth. Take a clear photo of the existing wiring as a backup reference. Carefully note if you have a jumper wire‚ and where it is connected. This detailed labeling ensures that you reconnect the wires to the correct terminals on the new Sensi thermostat base‚ preventing any potential issues with your HVAC system. Double-check your labels before disconnecting anything.
Connecting Wires to the New Thermostat Base
With your existing wires labeled‚ you can now proceed to connect them to the new Sensi thermostat base; Carefully align each labeled wire with its corresponding terminal on the Sensi base. Refer to the labels you created in the previous step and the Sensi app’s instructions for precise placement. Gently insert each wire into the correct terminal‚ ensuring a secure connection. Avoid forcing the wires‚ as this could damage the terminals. Double-check that each wire is firmly seated and that no bare wire is exposed. If you encounter any difficulty‚ consult the Sensi app or the included documentation for guidance. Proper wire placement is crucial for the thermostat to function correctly‚ so take your time and ensure accuracy. Once all wires are connected‚ proceed to the next step.

Connecting to Your Wi-Fi Network
Establishing a Wi-Fi connection is essential for remotely controlling your Sensi thermostat via the mobile app. This process generally involves using the Sensi app to guide you through connecting your thermostat to your home’s Wi-Fi network. Ensure your Wi-Fi network is a 2.4GHz network‚ as this is the standard frequency supported by Sensi thermostats. During the connection process‚ the app may request your Wi-Fi network name and password. You might also need the unique PIN or QR code from your Sensi thermostat. The exact steps may vary depending on the Sensi model‚ app version‚ and your mobile device’s operating system. Carefully follow the prompts within the app to ensure a smooth and successful Wi-Fi connection. This connection allows you to control your thermostat from anywhere.
Using the Sensi App for Wi-Fi Setup
The Sensi app provides a user-friendly interface for connecting your thermostat to Wi-Fi. After physically installing the thermostat‚ open the app and navigate to the ‘Connect to Wi-Fi’ section. The app will then guide you through a series of steps. It will prompt you to select your Wi-Fi network from a list of available networks. You’ll need to enter your network password when requested. The app may also ask you to scan a QR code or manually enter a PIN code found on your thermostat. This step is critical for secure and direct communication between your thermostat and the app. The app will confirm a successful connection‚ allowing you to control your thermostat remotely. Always follow the on-screen prompts carefully.
Manual PIN Entry for Connection
If you encounter difficulties using the QR code scanning feature‚ the Sensi app allows for manual PIN entry. This PIN is typically located on the thermostat itself‚ often under or near the QR code. In the Sensi app‚ choose the option for manual PIN entry. Carefully type the PIN‚ ensuring accuracy. This method bypasses the need for a camera scan and establishes a direct connection with the thermostat. The PIN is unique to each thermostat and is essential for security during setup. Once the PIN is entered correctly‚ the app will verify the device and finalize the Wi-Fi connection process. This manual option provides a reliable alternative for users unable to scan the QR code.
Powering On and Completing Installation
With all wiring properly connected‚ it’s time to power on your Sensi thermostat and finalize the installation. Begin by inserting the provided batteries into the designated compartment‚ typically located on the back of the thermostat unit. Once the batteries are in place‚ the Sensi thermostat will power on automatically. Carefully align the thermostat cover with the base and gently push it into place. Ensure that the cover is securely attached. The Sensi app will guide you through any remaining steps‚ such as confirming your Wi-Fi connection and registering the thermostat. With this‚ the physical installation is complete‚ and you can now proceed to enjoy the convenience of your smart thermostat.
Installing Batteries and Attaching the Cover
The final steps in physically installing your Sensi thermostat involve powering it up and securing the cover. Begin by locating the battery compartment‚ usually on the back of the thermostat unit. Insert the provided AAA batteries‚ ensuring they are correctly aligned according to the polarity markings. Once the batteries are in‚ the thermostat will power on. Next‚ carefully align the thermostat cover with the base‚ making sure all the internal components are properly positioned. Gently push the cover onto the base until it clicks or snaps into place‚ indicating a secure fit. With the cover properly attached‚ the physical installation is now complete.
Understanding Wiring Configurations
Proper wiring is crucial for the correct operation of your Sensi thermostat. Different HVAC systems utilize various wiring configurations‚ and it’s essential to identify and understand yours before proceeding with the installation. Common wiring includes terminals for power (R‚ Rc)‚ cooling (Y)‚ heating (W)‚ and fan (G). Some systems may also include a common wire (C)‚ which is necessary for consistent power to the thermostat. Additional wires‚ like those for heat pumps or two-stage systems‚ will require different connections. Always refer to the Sensi app and your HVAC system’s manual to correctly match wires to the appropriate terminals‚ ensuring proper function and avoiding potential damage.
Common Wire Considerations
The common wire‚ often labeled as ‘C’‚ provides a continuous power supply to your Sensi thermostat‚ which is essential for consistent operation‚ particularly with Wi-Fi connectivity. Not all older homes have a common wire‚ but it may be available behind the wall. If you don’t have a common wire‚ some Sensi models can work with a battery power‚ though this may limit functionality. There are also accessories you can purchase to add a common wire. The Sensi app provides guidance and troubleshooting steps to help you address the absence of the common wire. Ensuring correct C-wire use or its alternative is crucial for reliable thermostat performance‚ preventing issues like inconsistent connectivity or battery drain.
Two Stage Furnace Wiring
Wiring a Sensi thermostat to a two-stage furnace requires careful attention to the W1 and W2 terminals. The W1 terminal controls the first stage of heating‚ while the W2 terminal activates the second stage for increased heat output. Most manufacturers utilize the ‘O’ terminal for reversing valves‚ but it’s crucial to verify your equipment manual to ensure proper setup. A separate wire will need to connect to the W2 terminal on the Sensi base if you have a two-stage system. The Sensi app provides step-by-step guidance for connecting these wires‚ and selecting the correct configurations during setup. This ensures the thermostat properly manages heating to optimize comfort and energy use.
Troubleshooting Installation Issues
Encountering problems during Sensi thermostat installation is not uncommon‚ but most issues can be resolved with careful troubleshooting. If the thermostat fails to power on‚ ensure the batteries are correctly installed and the battery tag is removed. For Wi-Fi connectivity problems‚ verify your network name and password‚ and ensure the Sensi app has Bluetooth access. If you are having problems scanning the QR code‚ you can use the manual PIN entry. If the thermostat is not properly controlling your system‚ double-check all wire connections against the labeled terminals. Consult the Sensi app or the online resources for further assistance with these and other issues.
Sensi App Features and Remote Control
The Sensi app provides a user-friendly interface for managing your thermostat‚ offering remote control capabilities. With the app‚ you can adjust temperature settings‚ create schedules‚ and monitor energy usage from anywhere. The app also provides step-by-step guides for installation and troubleshooting. It allows you to receive alerts about your HVAC system’s performance‚ helping to predict and prevent potential issues. The Sensi app allows you to connect to your Sensi thermostat via Wi-Fi and Bluetooth. The app is compatible with both iOS and Android devices‚ ensuring access for all users‚ and also has a feature to allow manual PIN entry for connecting your thermostat.